Posts

B&W to Color Project
Image
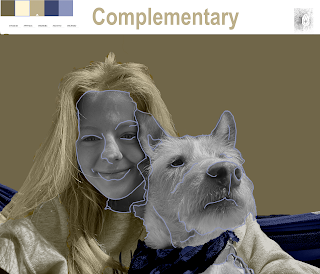
  Original Photo:  Artist Statement:       For this project, we worked in the Adobe system called, Photoshop. The aim of the project was to change a black and white photo into a colored photo based on certain groups of colors. The groups of colors I used were triad, monochromatic, and complementary; all these groups were based in the yellow field. I really like yellow and think that it speaks a little to who I am as a person, so I thought it would be a good choice to color myself and dog with. The picture I choose to change is a picture taken about a year and a half ago of my dog and I. I love this picture because even though it is not seen that well, my dog and I are hammocking in the picture.        This art piece was more difficult than others to complete; I really struggled in the beginning trying to get comfortable with the quick selection tool. Sometimes, it would select too many things and then I would have to go back and cut out ...
TagBrush Project

Image
  Original Logo:      This was made in the Abode System, Photoshop. In the system, I used a logo I had created for an earlier project. This tag was made through five different layers; I used a negative, scratches, spray, logo, and background in order to make the original tag. When using the negative layer, I had to position it just right, so that the white streaks of the file would not drown out my logo completely. In the scratches file, I enlarged it, so that I could get a bigger scratch running down the center of my logo. I think that a large scratch really tuned the art into being something that was older and more rustic. The spray I choose was more of a splatter, this was because I wanted it to look more like spray paint down from far away. Also, before making the layers of my tag, I made a path around the logo; with this path, I tried to make it look like it was actually a piece of paper cut to make an outline for a real tag that would be used in street art...

Photoshop HW: 1

 Video Tutorials on Photoshop Tools  Video 1      This video shows us how to use the "Clone Stamp Tool". This tool is used to tool up images with other images taken like it, in order to remove errors. These errors can include peoples' eyes being closed in one image and not the other or having a person in the background of an image and not the other. I think this tool will be a bit challenging to use, just because you have to be careful with the images that you are taking your sample point from. I really liked how this instructor broke down the steps on how to use the tool. The most interesting part of this video was how easily you can distort images with where you put your sample point.  Video 2      This video goes over how to use the "Marquee Tool" in Photoshop. This tool lets the artist select rectangles, squares, and ellipses then with that shape you can move it anywhere in your work. This video also goes through how to make a perfect sel...

Logo Project

Image
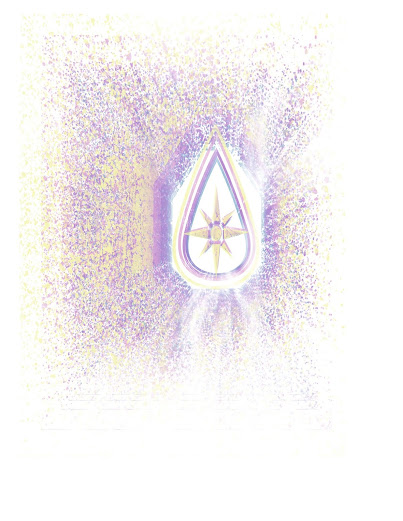
Logo Project          This project was completed on Adobe Illustrator. At first when I was told that I had to make a logo or symbol that represented myself, I was pretty scared of the project; mainly because I could not think of objects that encompassed who I was as a person completely. During the sketch phase of the project, I drew a water drop,  ASL "Y"-hand, books, ice cream cone, and the North Star. All of these symbols represented a part of myself or my life that has been super meaningful. I decided upon combining the water drop and the North Star; the star and the water drop represent my relationship with my dad and the years I spent competitively swimming. The North Star connects to the relationship with my dad because we both are people who love the outdoors and hiking, so a large part of the memories I have with my dad are spent outside.       In Adobe Illustrator, I used the ellipse tool, the rectangle tool, and the d...

Calligram Project

Image
  Calligram Project           My project is a flower designed in Adobe Illustrator. I choose a flower because of my new interest in botany, specially botanical flora studies. I thought that this represented a part of myself, and allowed for better self expression. The calligram is made up of a letter I wrote to future-self in twenty years. The letter speaks about events and hobbies that I hope I have kept up, as well as; the letter talks about different mottos I hope I have kept relevant in my life. I think combining my new interests and a letter about my hopes for new interests letter in life matched well.       Adobe Illustrator allowed for creative freedom when deciding what shape I wanted to communicate my letter through. I originally was planning on doing a hot-air ballon for my shape, however this changed when I realized that it did not represent me fully. This project took around four hours to co...

Illustrator Homework 1

 Video 1 (Clipping Mask Tool)      The clipping mask tool is an option you can use in Illustrator. This tool allows u to clip certain patterns or colors into a shape. The video goes through how to use the clipping tool and all the layering capabilities you have with the process. I think this tool was will be easy to use, and I think that it will allow for me to create all different types of interesting background patterns for business logos.  I think the video was very informative and it was great at explaining the process in simple and easy to follow terms. I found it interesting that he broke down the topic very fast, but I could still understand every step and direction needed to get the final result.  Video 2 (Knife, Scissors, and Eraser Tools) The tools discussed in this video are the eraser, scissors, and knife. The video starts off with how the eraser tool works, this tool is one of the easier tools to use in Illustrator. It allows you to get rid of ...

Canvas Project

Image
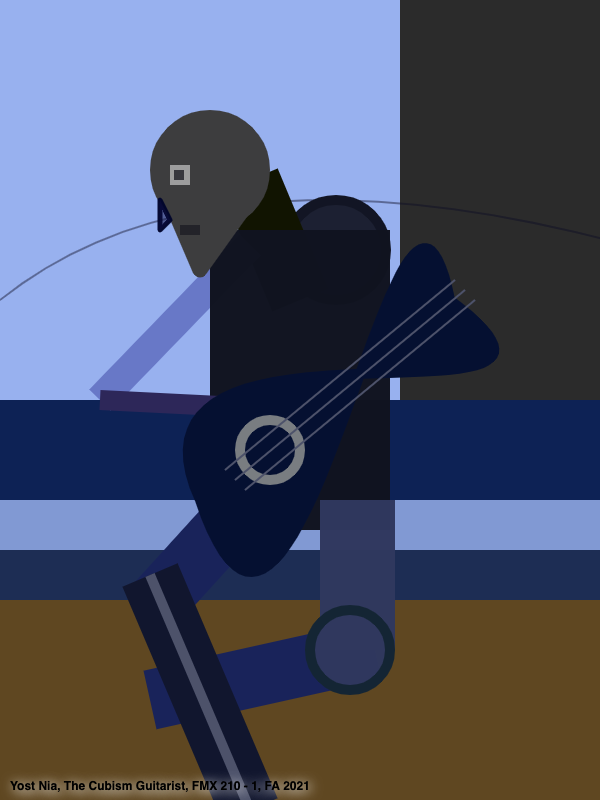
       My project was a rendition of Pablo Picasso’s “The Guitarist”.  This canvas project was created using the processing system Dreamweaver. Within Dreamweaver, I used HTML Canvas code in order to make my project. The inspiration photo of the project is at the end of this post. I love the painting, “the Guitarist” and wanted to be able to include it as an inspiration somewhere in my digital media course projects. Instead of completely following Pablo Picasso’s original painting, I went more of the cubism route. Again, my love for Pablo Picasso’s paintings influenced this decision, as well as; I really wanted to be able to play around with the shapes that I learned in class. These shapes included: circles, squares, rectangles, triangles, lines, and curves. I worked on this for a few hours each day and took about a week to finish. Overall, it took about 17 hours to complete.      Using Dreamweaver was had a learning-curve to it. However, once you...